IntelliJ IDEA と Spring Boot と Thymeleaf で Tailwind CSS を使う
前提
開発中のHTMLとCSSの確認は、IntelliJ IDEA で Controllキー + D を押して「ビルド + Spring Boot Application起動」してローカル環境でWEBブラウザを目視する事を前提としている。
(HTML または CSS を変更する事で自動でビルド + 起動はしない。)
Version
- Spring Framework Boot Starter Web 2.6.7
- Spring Framework Boot Starter Thymeleaf 2.6.7
- Tailwind CSS 3.0.24
手順
1. Tailwind CSS をインストールする
$ yarn add --dev tailwindcss
2. tailwind.config.js を生成する
$ npx tailwindcss init
3. ./tailwind.config.js に下記を記述する
module.exports = {
  content: ["./src/**/*.{html,js}"],
  theme: {
    extend: {},
  },
  plugins: [],
}
4. ./src/main/resources/static/css 配下に tailwind/input.css を作成する
5. ./src/main/resources/static/css/tailwind/input.css に下記を記述する
@tailwind base;
@tailwind components;
@tailwind utilities;
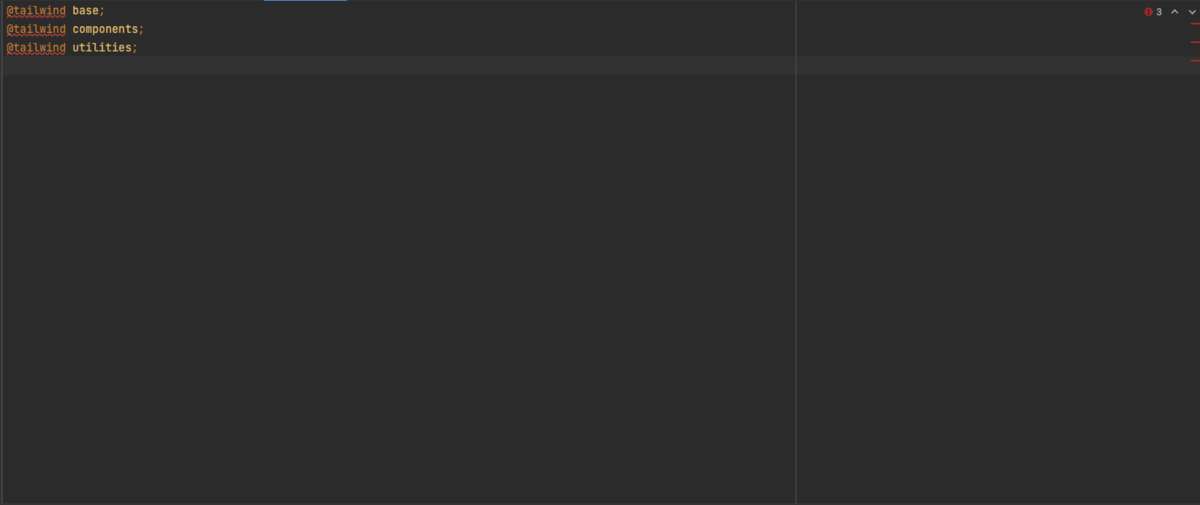
5-1. 上記5の @tailwind に赤い警告が出たら...

6. ./src/main/resources/static/css/tailwind 配下に generator.sh を作成する。
7. ./src/main/resources/static/css/tailwind/generator.sh に下記を記述する
#!/bin/sh
CURRENT_DIRECTORY=`dirname $0`
npx tailwindcss -i "$CURRENT_DIRECTORY/input.css" -o "$CURRENT_DIRECTORY/tailwind.css"
8. ./generator.sh に実行権限を付与する
$ chmod 744 generator.sh
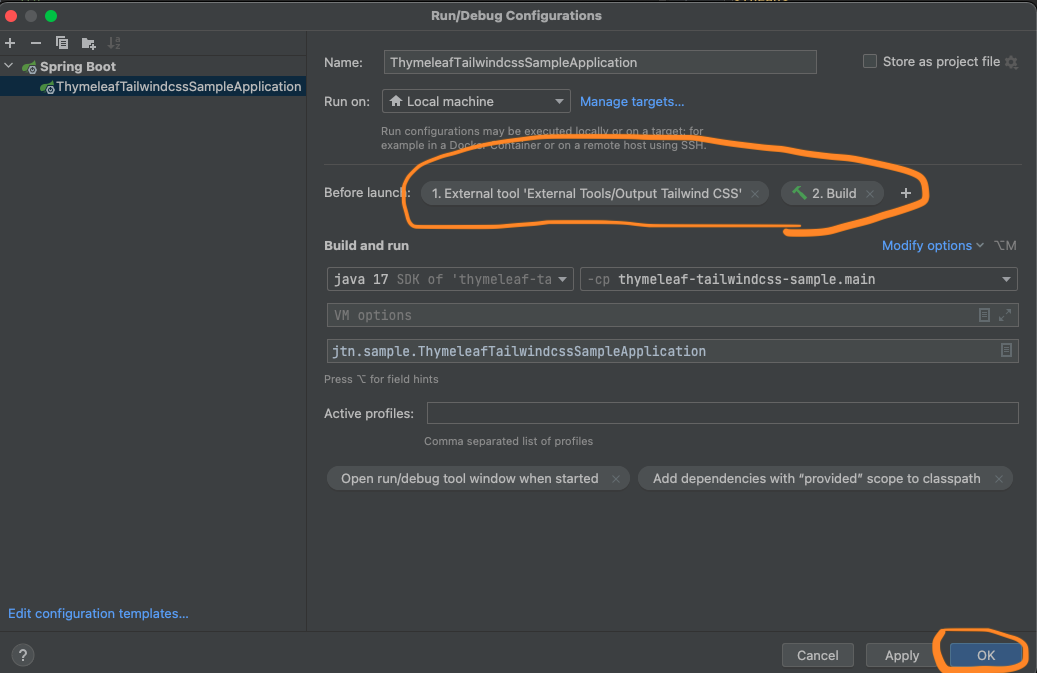
9. IntelliJ IDEA の Edit Configurations を開く

10. Modify options を開く

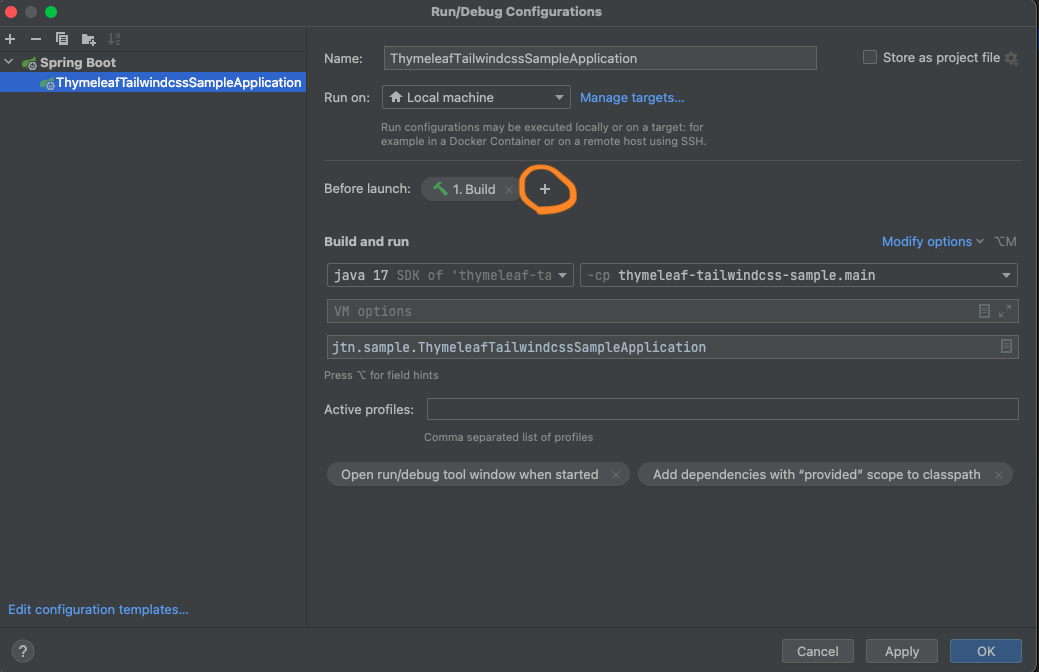
11. Add before launch task を押下
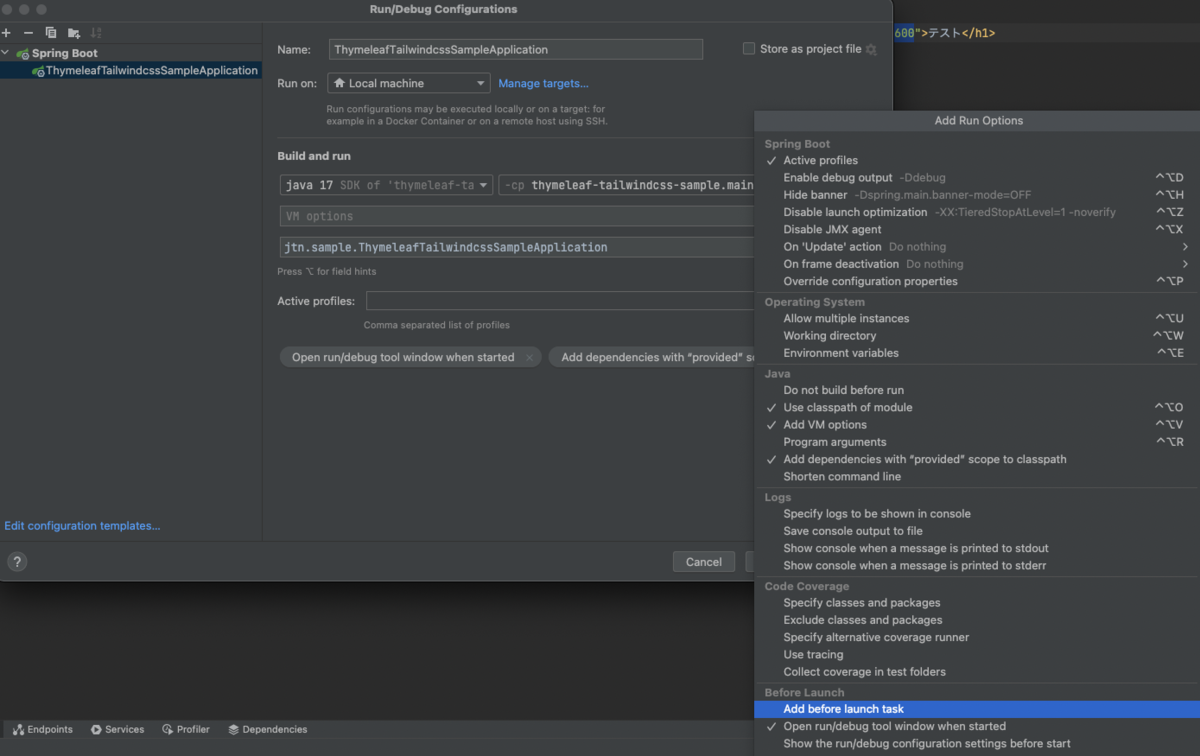
12. 「+」を押下
13. Run External tool を押下
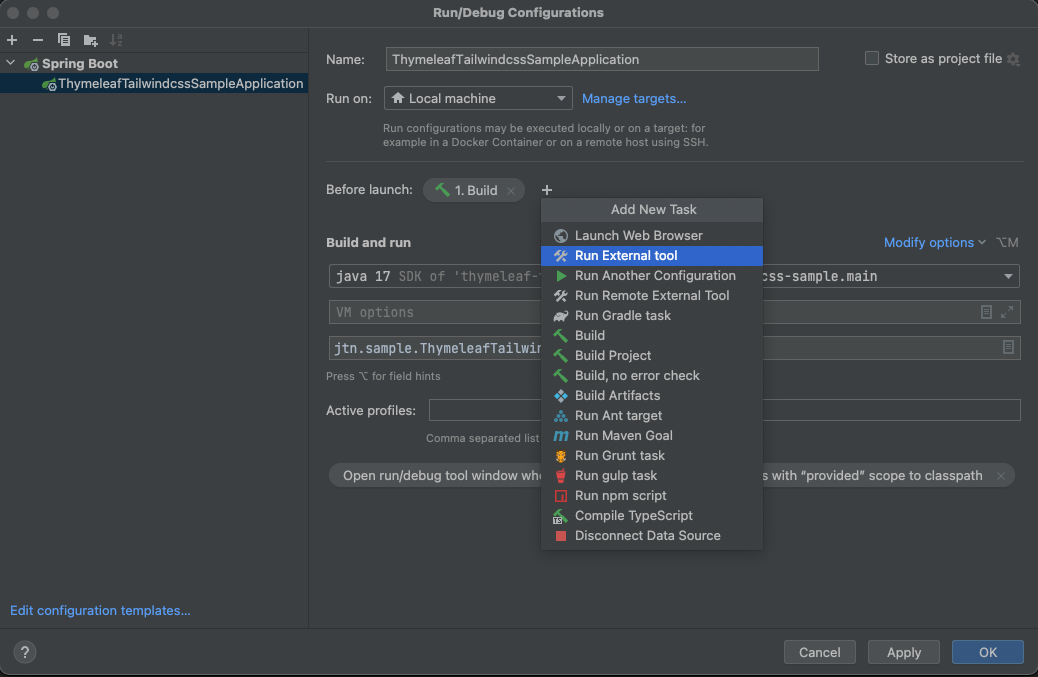
14. 「+」を押下

15. 必要事項を入力
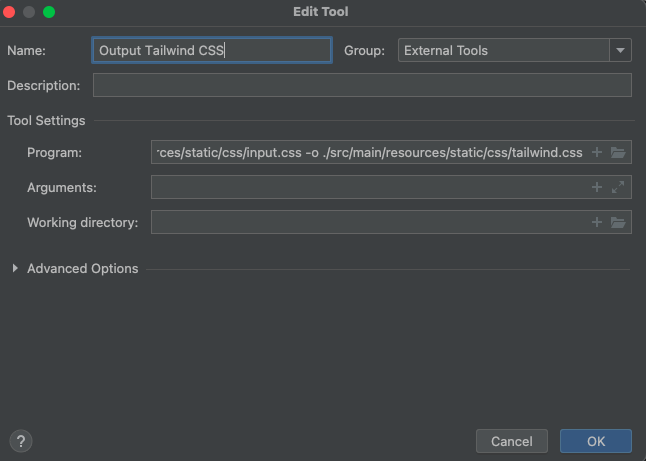
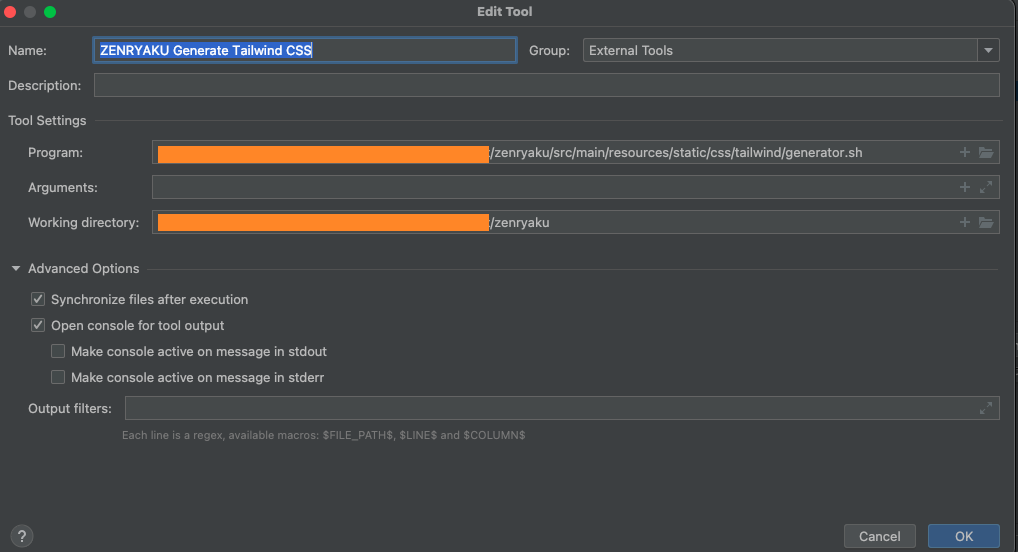
・Name
識別する名称
(例)Output Tailwind CSS
・Program
上記7で作成した tailwind.sh ファイルのパスを入力 または 選択する。
・Working directory
tailwind.config.jsファイルがあるディレクトリ(この記事の場合は、プロジェクトのルート)を指定する。
これは、 npx tailwindcss で tailwind.config.js のパスを指定しなければいけない。
指定しない場合は、デフォルトで current directory が指定される。
その為、 tailwind.config.js ファイルがあるディレクトリを指定する。
16. 起動順序を入れ替えてOKボタンを押す
1番目に External tool External Tools/Output Tailwind CSS
2番目に Build
17. HTMLを作成して生成した tailwind.css をダウンロードするように記述する
<!DOCTYPE html>
<html lang="ja">
<head>
    <meta charset="UTF-8">
    <title>Test</title>
    <link th:href="@{~/css/tailwind.css}" rel="stylesheet">
</head>
<body>
<h1 class="text-3xl underline text-red-600">テスト</h1>
</body>
</html>